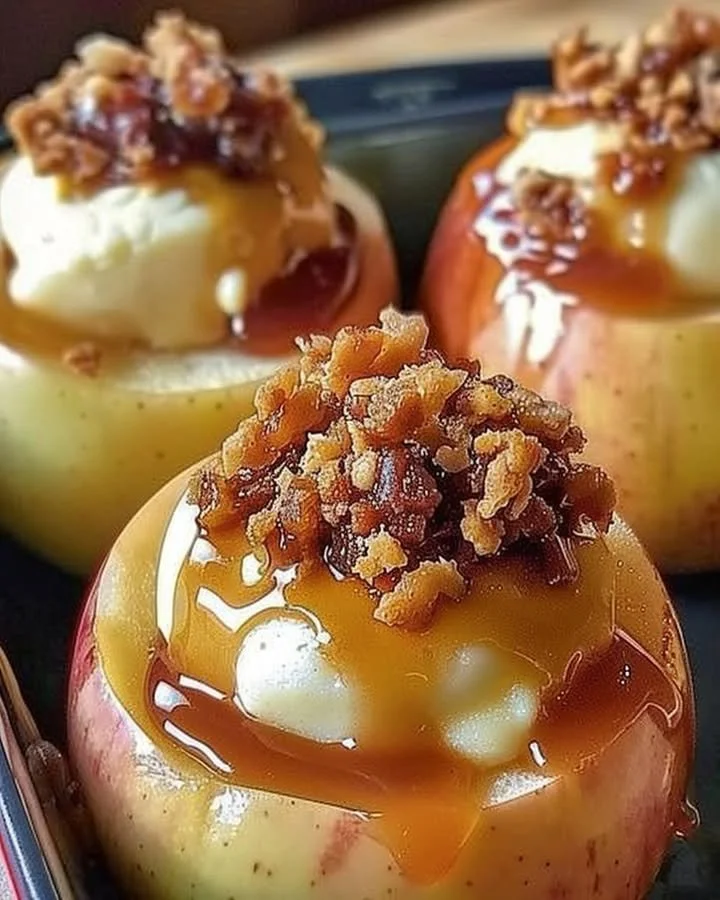
Cheesecake Stuffed Baked Apples
Rich, creamy, and wonderfully aromatic, Cheesecake Stuffed Baked Apples are a delightful twist on traditional baked apples. Picture the golden, tender flesh of a baked apple, nestled around a luscious, velvety cheesecake filling that fragrant cinnamon elevates to new heights. This recipe is a step-by-step journey through comforting flavors and heartwarming aromas that will transport you straight to a cozy kitchen filled with the scent of baked goodness. With each bite, you’ll experience a harmonious blend of textures — the crunchy exterior of the apple meets the smooth creaminess of the filling, offering a delightful contrast that is as pleasing to the palate as it is to the senses.
Delving into the history of baked apples uncovers an intriguing culinary journey. Baked apples have been a beloved treat for centuries, originating from the need to preserve the harvest and utilize the abundant autumn bounty. The combination of sweet apples and a creamy filling can be traced back to various regional desserts across Europe, each infusing its cultural essence into the dish. The concept of stuffing apples, however, truly gained popularity in the United States, where new variations emerged, including those with cheesecake-inspired fillings. Cheesecake stuffed baked apples have become a cherished favorite among dessert lovers and a comforting dish in many households.
For those eager to recreate this delightful dessert, here are the ingredients you’ll need:
- 4 medium-sized apples (such as Granny Smith or Honeycrisp), whose inviting sweetness and crisp texture perfectly complement the rich filling
- 8 oz cream cheese, softened to ensure a smooth, creamy texture that melds beautifully with other ingredients
- 1/2 cup powdered sugar, adding just the right amount of sweetness reminiscent of delightful confections
- 1 teaspoon vanilla extract, capturing the essence of warmth and nostalgia with its sweet fragrance
- 1/2 teaspoon ground cinnamon, providing a warm, spicy aroma that dances in the air
- 1/4 cup graham cracker crumbs, offering a crunchy element that balances the creamy filling
- 1/4 cup chopped nuts (optional), adding a delightful crunch for those who love a bit of texture in their desserts
- 2 tablespoons butter, melted, contributing a rich flavor while helping to caramelize the apple skin
- Whipped cream for serving (optional), bringing an extra touch of indulgence to this already decadent dessert
The beauty of Cheesecake Stuffed Baked Apples is that they can be prepared in both quick and slow methods. If time is of the essence, a quicker approach could involve using pre-made cheesecake filling or skipping the baking process while still enjoying the flavors. However, taking your time allows the flavors to meld and the apples to become exquisitely tender. Practical tips for success include using apples that have a firm texture and ensuring the cream cheese is adequately softened for smooth mixing. Don’t be afraid to experiment with different nuts or spices that suit your palate!
To create this stunning dessert, begin by preheating the oven to 350°F (175°C). As you do, allow the anticipation of warmth to fill your kitchen. Next, take your apples and carefully core each one, creating a hollow center that retains the bottom to cradle the filling. In a mixing bowl, combine the softened cream cheese, powdered sugar, vanilla extract, and ground cinnamon. With a fork, blend the mixture until it is smooth and creamy, a texture that invites spoonful after spoonful. For added crunch, fold in the graham cracker crumbs and, if desired, the chopped nuts—these will give the filling a delightful bite.
Now, it’s time to stuff the apples. Generously pack each hollowed apple with the creamy mixture, ensuring that each bite will be a delightful surprise. Place the stuffed apples in a baking dish, where they will soak up all the rich flavors. Drizzle the melted butter over the tops to infuse them with richness as they bake. Cover the dish with aluminum foil, allowing steam to build for the first part of cooking time. Bake for 25-30 minutes, or until you can easily pierce through the apples. In the final moments, remove the foil, allowing the tops to brown slightly, creating a tempting, golden crust.
This dessert is perfect for various occasions, whether as a warm family gathering after a hearty meal, a cozy evening treat, or even a charming addition to a festive holiday dessert table. Serve the cheesecake stuffed baked apples warm, with a dollop of whipped cream on top, inviting everyone to savor the magic of flavors.
When preparing Cheesecake Stuffed Baked Apples, it’s essential to avoid some common pitfalls. One mistake is overcooking the apples, making them mushy rather than tender with a slight bite. Ensure you monitor the baking time closely. Another misstep is not packing the filling tightly, which can lead to it spilling out during baking. To prevent this, press the filling in firmly but gently. Lastly, using apples that are too soft will not yield the desired texture, so always choose firm varieties.
For those looking to lighten their dessert or indulge in variations, there are several healthier alternatives. You could opt for low-fat cream cheese instead of full-fat, or use a sugar substitute to reduce sweetness. Swap the graham cracker crumbs with finely ground oats for a gluten-free option, or add a pinch of nutmeg alongside the cinnamon for a spiced kick. Another delightful variation could include fresh fruits such as cranberries mixed into the filling for a tart contrast to the sweetness.
As for any burning questions, here are some FAQs about Cheesecake Stuffed Baked Apples:
Can I use any type of apple?
Yes, varieties like Granny Smith or Honeycrisp work best due to their balance of sweetness and tartness.Can I make the filling ahead of time?
Absolutely! Preparing the filling in advance can save time during assembly and baking.How do I ensure the apples don’t get too mushy?
Monitor them closely in the oven; check for tenderness around the 25-minute mark.Can I freeze the stuffed apples before baking?
Yes, you can freeze them. Just make sure to thaw before baking, adjusting the cooking time accordingly.What nuts work best in the filling?
Walnuts or pecans are excellent choices for added flavor and crunch.Is there a non-dairy version of this recipe?
Yes, you can substitute the cream cheese with a non-dairy cream cheese alternative to make it vegan.
If you’re looking for a heartwarming dessert that combines a nostalgic taste with a cozy presentation, Cheesecake Stuffed Baked Apples are a must-try. The process of preparing and baking these delightful treats is as enjoyable as the final result. The warm aroma of cinnamon filling your kitchen will draw you in, and the first decadent bite will entice you to savor every morsel. Don’t wait—gather your ingredients and treat your loved ones to this exquisite dessert experience today!
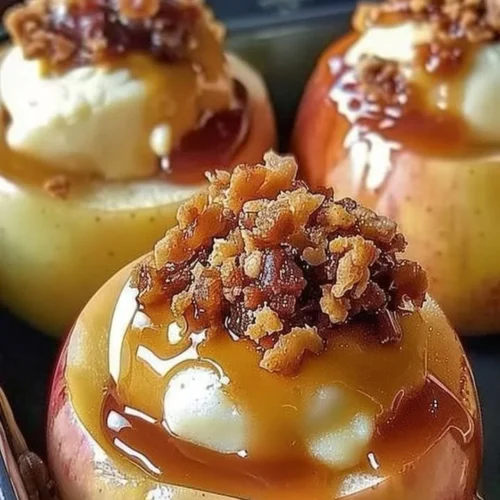
Cheesecake Stuffed Baked Apples
Ingredients
Main Ingredients
- 4 medium-sized medium-sized apples (such as Granny Smith or Honeycrisp) Choose firm apples for best texture.
- 8 oz cream cheese, softened Ensure it is softened for smooth mixing.
- 1/2 cup powdered sugar Adds sweetness.
- 1 teaspoon vanilla extract For flavor.
- 1/2 teaspoon ground cinnamon Provides warming spice.
- 1/4 cup graham cracker crumbs Offers crunch.
- 1/4 cup chopped nuts (optional) Use walnuts or pecans for added crunch.
- 2 tablespoons butter, melted To drizzle over the apples.
- to taste Whipped cream for serving (optional) For an indulgent touch.
Instructions
Preparation
- Preheat the oven to 350°F (175°C).
- Core the apples, creating a hollow center while retaining the bottom.
- In a mixing bowl, combine softened cream cheese, powdered sugar, vanilla extract, and ground cinnamon, blending until smooth and creamy.
- Fold in the graham cracker crumbs and optional chopped nuts.
- Stuff each cored apple generously with the cheesecake mixture.
Baking
- Place the stuffed apples in a baking dish and drizzle melted butter over the tops.
- Cover with aluminum foil and bake for 25-30 minutes until tender.
- Remove the foil in the last few minutes to allow the tops to brown slightly.