Homemade Cherry Ice Cream
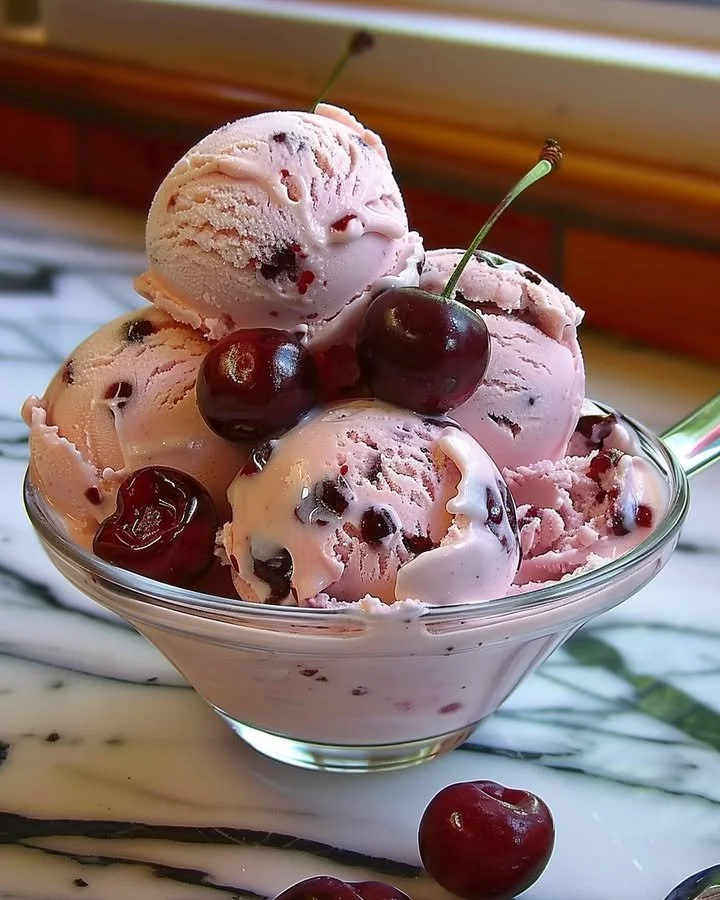
The delightful indulgence of Homemade Cherry Ice Cream brings a burst of summer flavors right to your home. Imagine the rich, creamy texture melting on your tongue as you savor the sweet, tangy taste of cherries. This recipe captures the essence of fresh cherries, enveloped in a velvety cream that dances on your palate. As you embark on this step-by-step journey of creating your own ice cream, your kitchen will fill with the sweet aroma of ripe cherries, reminding you of tranquil summer evenings.
History / Fun Fact
Ice cream’s origins date back to ancient cultures, with evidence of frozen desserts from China as early as 200 B.C. However, cherries have a rich history as well, particularly in North America, where they were first cultivated by Indigenous peoples. The combination of cherry and cream in ice-based desserts became popular in the 18th century, thanks to the availability of ice and fresh fruit during the summer months. Today, cherry ice cream remains a beloved treat, especially in warmer seasons, symbolizing nostalgia and carefree days of childhood.
Ingredients
To create this luscious Homemade Cherry Ice Cream, you will need:
- 2 cups cherries, pitted and halved: Juicy and vibrant, these cherries provide the foundation of your ice cream. Their natural sweetness and slight tartness will shine through in every bite.
- 1 cup heavy cream: Rich and luxurious, heavy cream transforms this treat into an indulgent dessert that feels extravagant yet comforting.
- 1 cup whole milk: Adding a beautiful creaminess, whole milk balances the flavors without overpowering the fresh cherries.
- 3/4 cup granulated sugar: This sugar sweetens the mix, enhancing the natural flavors of the cherries and creating velvety smoothness.
- 1 teaspoon vanilla extract: The aromatic warmth of vanilla complements the cherries perfectly, adding depth and richness.
- Pinch of salt: Just a touch of salt will enhance all the flavors, making the sweetness pop.
Cooking Time & Tips For Homemade Cherry Ice Cream
When it comes to preparing this ice cream, you have the option of a quicker route or a leisurely one. The quick method involves using an ice cream maker, providing instant gratification. Conversely, a slower approach allows the flavors to develop more intricately. For best results, ensure your ice cream maker is fully chilled before use, and that your cherries are at peak ripeness to amplify their natural flavor. Allowing the cherries to macerate with sugar will enhance their sweetness and create a syrupy base that’s simply irresistible.
Step-by-Step Directions
Begin your ice cream adventure by tossing the pitted and halved cherries into a medium bowl with 1/4 cup of granulated sugar. Let them sit for about 30 minutes to macerate. This step is vital; as the cherries sit, they release their juices, becoming syrupy, sweet, and rich in flavor, which will be integral to your ice cream.
In a separate mixing bowl, combine the heavy cream, whole milk, the remaining 1/2 cup of sugar, vanilla extract, and a pinch of salt. With a whisk, mix together these ingredients until the sugar is fully dissolved, creating a smooth and creamy base that smells simply divine.
Once your cherry mixture has had time to sit and become wonderfully fragrant, gently fold it into the cream mixture you prepared earlier, ensuring it is thoroughly combined. You want every spoonful of ice cream to be infused with that vibrant cherry goodness!
Next, pour this enticing mixture into your ice cream maker. Churn according to the manufacturer’s instructions until the ice cream reaches a soft-serve consistency—this will only take about 20-30 minutes, filling your home with sweet aromas.
After churning, it’s time to transfer this luscious treat into a lidded container. Place it in the freezer for at least four hours, allowing it time to firm up perfectly, creating that satisfying scoop you crave.
Finally, serve up your homemade cherry ice cream in a bowl or a cone. As you take your first taste, close your eyes and relish the delightful medley of sweet and creamy textures, celebrating the deliciousness you’ve created!
Serving Suggestions & Occasions
Homemade cherry ice cream is perfect for all occasions—from casual family gatherings to sophisticated dinner parties. Serve it in delicate cones garnished with fresh mint leaves or alongside warm chocolate cake for an indulgent dessert. Alternatively, scoop it into bowls topped with crushed nuts or drizzles of chocolate sauce for a decorative touch. This vibrant dessert is also ideal for summer picnics, offering a refreshing treat under the sun’s warm glow.
Common Mistakes For Homemade Cherry Ice Cream
One common mistake is not allowing the cherries to macerate long enough, which robs the ice cream of its full flavor potential. Additionally, using warm ingredients instead of cold can lead to a less than silky texture. Make sure that all your components are well chilled prior to churning to avoid a gritty texture. Finally, resist the temptation to skip the freezer step—patience is key for the perfect scoop!
Healthier Alternatives & Variations
Looking for variations? Consider swapping out heavy cream with coconut cream for a dairy-free alternative that still delivers that creamy texture. You can also sweeten the base with honey or maple syrup for a more natural sweetness. For a twist, try blending in other fruits like raspberries or blueberries alongside cherries, creating a mixed berry ice cream that bursts with flavor. Moreover, you can infuse the mixture with herbs like mint or basil, introducing a unique aromatic flair to each bite.
FAQs
Can I use frozen cherries instead of fresh?
Yes, you can substitute frozen cherries, but ensure they are thawed and drained well before using them to prevent excess moisture.How long does homemade cherry ice cream last in the freezer?
When stored properly in an airtight container, it can last for up to two weeks in the freezer.Can I make this recipe without an ice cream maker?
Absolutely! You can pour the mixture into a shallow dish and freeze it, stirring every 30 minutes until you achieve the desired consistency.Is there a way to make this recipe sugar-free?
Yes, you can use sugar substitutes like stevia or erythritol, adjusting the amount according to the product’s sweetness.Can I add chunks of fresh cherries into the ice cream?
Definitely! After churning, you can fold in chunks of fresh cherries for an added burst of texture and flavor.What can I do if my ice cream is too hard after freezing?
Leave it out at room temperature for 5-10 minutes before scooping; this will help soften it to the perfect serving texture.
Conclusion
This Homemade Cherry Ice Cream recipe is an irresistible treat waiting to be made. With its lush, creamy texture and sweet cherry flavor, it’s a celebration of summer in every scoop. Whether as a simple dessert after dinner or a delightful addition to a sunny picnic, this recipe beckons you to try it immediately. Your taste buds deserve this charming indulgence, so gather your ingredients, roll up your sleeves, and dive into the joy of making your own delectable cherry ice cream today!
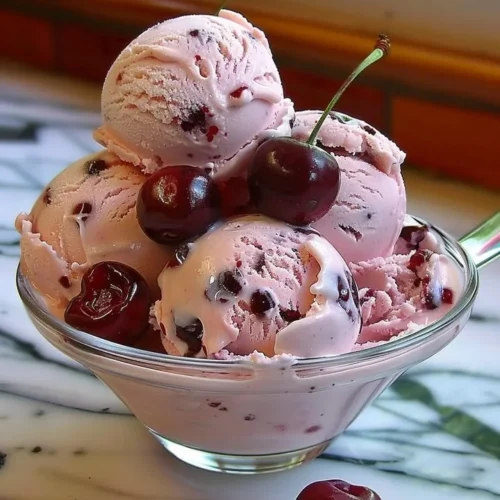
Homemade Cherry Ice Cream
Ingredients
For the Cherry Mixture
- 2 cups cherries, pitted and halved Juicy and vibrant cherries provide the foundation of the ice cream.
- 1/4 cup granulated sugar Used to macerate the cherries.
For the Ice Cream Base
- 1 cup heavy cream Adds richness and luxury to the dessert.
- 1 cup whole milk Balances flavors without overpowering the cherries.
- 3/4 cup granulated sugar Sweetens the ice cream and enhances cherry flavor.
- 1 teaspoon vanilla extract Adds depth and richness to the flavor.
- 1 pinch salt Enhances all flavors in the ice cream.
Instructions
Preparation
- Toss the pitted and halved cherries into a medium bowl with 1/4 cup of granulated sugar. Let them sit for about 30 minutes to macerate.
- In a separate mixing bowl, combine the heavy cream, whole milk, the remaining 1/2 cup of sugar, vanilla extract, and a pinch of salt. Whisk until the sugar is fully dissolved.
Mixing
- Gently fold the cherry mixture into the cream mixture until thoroughly combined.
Churning
- Pour the mixture into your ice cream maker and churn according to the manufacturer's instructions until it reaches a soft-serve consistency, about 20-30 minutes.
Freezing
- Transfer the ice cream to a lidded container and place it in the freezer for at least four hours to firm up.
Serving
- Serve the homemade cherry ice cream in a bowl or cone and enjoy the delightful flavors.