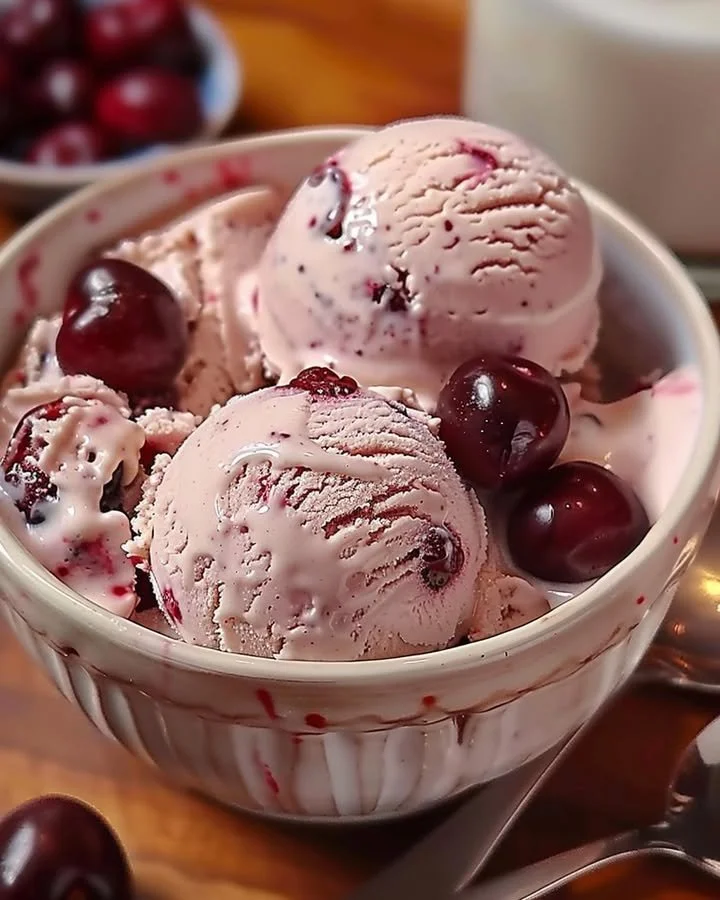
Homemade Cherry Vanilla Ice Cream
There’s something incredibly nostalgic and indulgent about Homemade Cherry Vanilla Ice Cream. As you churn this delightful treat, the enchanting aroma of cherries mingles with the rich sweetness of vanilla, creating an irresistible sensory experience. This recipe is perfect for those warm summer afternoons when you want to cool down and treat yourself. With its creamy texture and delightful bursts of fresh cherries, this homemade ice cream embodies the essence of joyful childhood summers spent outside, laughing and playing. What could feel more satisfying than crafting your own creamy dessert, step-by-step, right in your kitchen?
History / Fun Fact
Ice cream has a storied history that can be traced back to ancient civilizations, where iced desserts were enjoyed by the nobility. However, the combination of cherries and vanilla is distinctly American, taking inspiration from the bountiful fruit orchards and the colonial love for both flavors. The cherry tree was famously praised by George Washington, and as Americans started to grow these luscious fruits, they began transforming them into a myriad of desserts. Using cherries in ice cream became popular in the 19th century thanks to the availability of ice, making it easier for home cooks to create this delightful frozen treat. Today, cherry vanilla ice cream stands as a classic favorite, cherished by many families across the globe, especially during picnics and holiday gatherings.
Ingredients
- 2 cups heavy cream: This rich and luscious cream brings a silky smoothness to your ice cream, melting in your mouth with every delectable bite.
- 1 cup whole milk: Adding just the right creaminess and body, whole milk balances the intense richness of the heavy cream, creating an invitingly smooth texture.
- 3/4 cup granulated sugar: Sweet and reliable, sugar transforms the mixture into a heavenly dessert, contrasting beautifully with the tartness of the cherries.
- 1 tablespoon vanilla extract: Aromatic and comforting, vanilla extract adds depth and warmth, elevating the overall flavor profile to pure bliss.
- 1 cup fresh or frozen cherries, pitted and chopped: Juicy and vibrant, cherries infuse bursts of flavor, intertwining with the creaminess to create a delightful experience.
- 1/2 teaspoon salt: A pinch of salt enhances all the flavors, balancing sweetness and bringing out the richness of the cream and cherries.
- Optional: additional cherries for serving: For those who cannot resist more fruitiness, serving with extra cherries creates an enticing finish.
Cooking Time & Tips For Homemade Cherry Vanilla Ice Cream
Creating your homemade cherry vanilla ice cream can be as quick or as leisurely as you choose. If you’re short on time, investing in an ice cream maker will greatly speed up the churning process. For those who prefer the slow satisfaction of handmade ice cream, hand-churning can enhance the flavors through careful blending.
To ensure your ice cream turns out perfectly creamy and smooth, here are some practical tips: make sure your ice cream maker’s bowl is frozen solid before using it, use high-quality vanilla extract, and ensure that the sugar is fully dissolved in your cream mixture for the best flavor. Patience is key! The longer you can let it churn and then freeze, the creamier your treat will be.
Step-by-Step Directions
In a cozy mixing bowl, combine the heavy cream and whole milk. As you pour in the silky liquid, the aroma of the cream fills the air, evoking memories of childhood desserts. Next, add the granulated sugar, where the sweet crystals will dissolve into the mixture.
With a good whisk or spatula, stir until the sugar completely dissolves; you want a harmonious blend without any grittiness. Then, add the fragrant vanilla extract, which twirls into the mixture adding warmth and depth, enhancing the cream’s richness. Don’t forget to sprinkle in the salt, which is crucial for balancing the sweetness.
Now it’s time to introduce the star of the show: the cherries! Gently fold in the chopped cherries, enjoying the vibrant colors and reminding you of sun-drenched summer days. Once combined, pour the enticing mixture into your ice cream maker and let it work its magic according to the manufacturer’s instructions.
As the ice cream churns, be ready to see the transformation from a liquid to a soft, velvety texture. When you reach that soft-serve consistency—a perfect moment of creamy, cherry-infused bliss—transfer the indulgent ice cream into an airtight container. Freeze it for at least 4 hours or until it’s firm enough to scoop into bowls. When it’s finally ready to serve, don’t hold back on adding extra cherries on top for that perfect finishing touch!
Serving Suggestions & Occasions
Homemade Cherry Vanilla Ice Cream is the ultimate crowd-pleaser and fits effortlessly into various occasions. Serve it in waffle cones at summertime barbecues or scoop generous portions into bowls for family movie nights. Pair it with warm chocolate cake or pie for a delightful dessert that’s both beautiful and delicious. It also makes an excellent accompaniment to fresh fruit salads and can delight guests at birthday parties, holiday gatherings, or simply as a special treat on a warm afternoon. The versatility of this ice cream makes it a welcome addition to your dessert table year-round.
Common Mistakes For Homemade Cherry Vanilla Ice Cream
Even the best bakers can make mistakes, so here are some common pitfalls to avoid when making your Homemade Cherry Vanilla Ice Cream. First, be sure to fully dissolve the sugar; any grains left will lead to an undesirable texture. It’s also essential to freeze your ice cream maker bowl overnight for it to churn effectively. If using frozen cherries, thaw them slightly before mixing to avoid extra water content affecting your ice cream’s texture. Below all, do not skip on the resting time in the freezer; the longer the mixture chills, the better the flavors meld together. And remember, patience pays off!
Healthier Alternatives & Variations
While this Homemade Cherry Vanilla Ice Cream is an indulgent treat, there are ways to make it a bit healthier! Consider substituting part of the heavy cream with coconut milk for a lighter, dairy-free option. If you prefer less sugar, opt for natural sweeteners like honey or maple syrup, adjusting the quantity to your taste. For a unique twist, try adding a splash of almond extract to enhance the flavor profile or infuse the base with fresh mint leaves for a refreshing hint. Additionally, experimenting with different fruits, such as raspberries or strawberries, can create variations that keep your ice cream adventures exciting.
FAQs
Can I use frozen cherries for this ice cream?
Yes, frozen cherries work well! Just thaw and chop them before adding to the mixture.How long does Homemade Cherry Vanilla Ice Cream keep in the freezer?
It can last up to two weeks if stored in an airtight container.Do I need an ice cream maker to make this recipe?
An ice cream maker is recommended for best results but you can try hand-churning if you’re up for it!Can I replace the heavy cream with something lighter?
You can substitute part of the heavy cream with full-fat coconut milk for a lighter alternative.What if I have leftover cherries?
Use them to garnish your ice cream or showcase them in other desserts!Is there a vegan version of this ice cream?
Absolutely! Substitute heavy cream with coconut cream and use a plant-based sweetener to create a vegan version.
Conclusion
Indulging in a bowl of Homemade Cherry Vanilla Ice Cream is more than just a sweet treat; it’s an experience bursting with vibrant flavors and comforting memories. With this straightforward recipe, you can create a luscious dessert that will tantalize your taste buds and transport you back to carefree summer days. So gather your ingredients and steps, and don’t wait any longer to whip up this delightful ice cream. You deserve a scoop (or two) of this creamy delight right now!
Homemade Cherry Vanilla Ice Cream
Ingredients
Base Ingredients
- 2 cups heavy cream This rich and luscious cream brings a silky smoothness to your ice cream.
- 1 cup whole milk Balances the intense richness of the heavy cream.
- 3/4 cup granulated sugar Transforms the mixture into a heavenly dessert.
- 1 tablespoon vanilla extract Adds depth and warmth to the flavor profile.
- 1 cup fresh or frozen cherries, pitted and chopped Infuses flavorful bursts into the ice cream.
- 1/2 teaspoon salt Enhances all the flavors.
- Optional additional cherries for serving For those who cannot resist more fruitiness.
Instructions
Preparation
- In a mixing bowl, combine the heavy cream and whole milk.
- Add the granulated sugar and stir until completely dissolved.
- Add the vanilla extract and sprinkle in the salt.
- Gently fold in the chopped cherries.
- Pour the mixture into the ice cream maker and churn according to manufacturer's instructions.
- Once it reaches a soft-serve consistency, transfer it to an airtight container.
- Freeze for at least 4 hours or until firm enough to scoop.