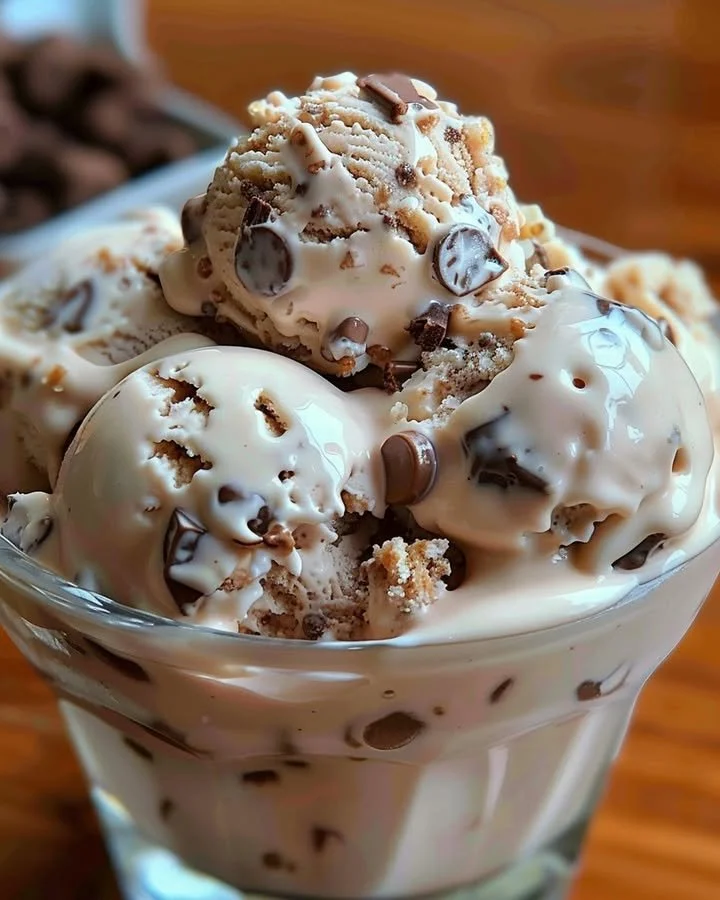
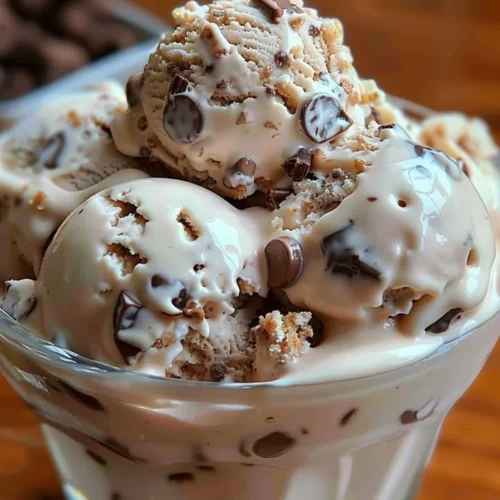
Rocky Road Ice Cream
There’s something undeniably enchanting about Rocky Road Ice Cream. The moment you scoop a rich, creamy portion into a bowl, you’re greeted with an intoxicating blend of aromas: sweet, rich chocolate mingled with the faint scent of vanilla, inviting you to indulge your senses. Imagine the sensation of biting into soft mini marshmallows, the crunch of toasted nuts, and the decadence of chocolate chips—it’s a flavor profile that dances on your taste buds and warms your soul. This recipe is a delightful balance of textures, with a creamy base and pronounced add-ins. Join me as we embark on a step-by-step journey to recreate this nostalgic treat in the comfort of your home.
History / Fun Fact
Rocky Road Ice Cream traces its origins back to the 1920s in the United States, with stories varying between different regions. Some believe it was invented by William Dreyer and Joe Edy in California, who crafted the delightful mix of chocolate ice cream, marshmallows, and nuts to symbolize the tough times they felt during the Great Depression. Others assert that its name reflects the rocky terrain of the roads taken during that era, embodying the spirit of hope and comfort amidst struggle. Whichever story rings true, one thing’s for certain: Rocky Road Ice Cream embodies a heartwarming nostalgia, becoming a comfort food that has bridged generations.
Ingredients
To create this sumptuous Rocky Road Ice Cream, you’ll need a handful of quality ingredients. Picture this: 2 cups of heavy cream, velvety and rich, adding an irresistible silkiness to your dessert; 1 cup of whole milk, bringing a comforting creaminess that balances the flavors; and 3/4 cup of granulated sugar, perfectly sweet and indulgent. To heighten the flavor, a splash of fragrant vanilla extract serves as an aromatic foundation. Dive into a half cup of chocolate chips—rich and decadent, mingling seamlessly with the other textures. Add a half cup of mini marshmallows, tender and pillowy, each bite adding a playful sweetness. Lastly, 1/2 cup of your choice of nuts—almonds, walnuts, or cashews—will deliver a satisfying crunch. Every ingredient is halal and contributes to a beloved ice cream that delights the senses.
Cooking Time & Tips For Rocky Road Ice Cream
Creating wonderful Rocky Road Ice Cream can be approached in two ways: quick or slow. A quick preparation, using an ice cream maker, takes about 30 minutes of hands-on time followed by a few hours to freeze, allowing you to satisfy those cravings almost immediately. In contrast, a slow method might include traditional hand-churning techniques, taking significantly longer but enriching the flavors and textures as they develop over time.
To ensure your ice cream turns out perfectly, consider these tips: Always chill your mixing bowl and ice cream maker bowl in advance. This helps in achieving a firmer texture quicker. Use high-quality ingredients for the best flavor. Don’t skip on letting the mixture chill in the refrigerator for a couple of hours before churning; it ensures a creamier end result.
Step-by-Step Directions
Begin this delicious journey by gathering your ingredients together on the counter, the thrill of anticipation building. In a large mixing bowl, combine the 2 cups of heavy cream, 1 cup of whole milk, 3/4 cup of granulated sugar, and 1 teaspoon of vanilla extract. Take a moment to whisk these together, feeling the smooth cream contrast with the grainy sugar as you mix until the sugar dissolves completely.
Once the mixture is well blended, pour it into your ice cream maker. Follow the manufacturer’s instructions for churning—typically, this will take about 20 to 25 minutes. As the mixture begins to thicken and transforms into a luscious soft-serve consistency, it’s time to add the magical mix-ins. In the last five minutes of churning, toss in the 1/2 cup of chocolate chips, 1/2 cup of mini marshmallows, and 1/2 cup of chopped nuts. The colors and textures burst forth in your ice cream, creating a symphony of sweet indulgence.
When churning completes, transfer your freshly made ice cream into an airtight container. Ensure you compact it down well and cover it with a lid, placing it into the freezer for at least 4 hours, or until it firms up beautifully. Finally, when it’s ready, scoop yourself a generous portion and enjoy this divine creation—each bite a testament to your culinary adventure.
Serving Suggestions & Occasions
Rocky Road Ice Cream can be served in various delightful ways. Consider topping each scoop with extra chocolate syrup or a sprinkle of crushed nuts for added texture and richness. You can create an ice cream sundae by adding whipped cream, a cherry, or even fresh fruit for a refreshing twist. This ice cream is perfect for birthday parties, summer picnics, or cozy winter nights by the fireplace—an all-season treat that can brighten any occasion!
Common Mistakes For Rocky Road Ice Cream
Even the best intentions can lead to common pitfalls. One mistake to avoid is not fully dissolving the sugar; this can lead to unpleasing gritty textures. Another is skipping the chilling step before churning; this can result in icier textures rather than the creamy delight you crave. Lastly, be cautious not to overload your mixture with too many add-ins; moderation is key, as it can prevent the ice cream from churning properly.
Healthier Alternatives & Variations
For those seeking healthier alternatives, consider using light coconut milk in place of heavy cream or whole milk, which can still deliver creaminess with fewer calories. Swap out sugar for a natural sweetener like honey or agave syrup to suit your preference. You can also experiment with different mix-ins, such as dried fruit for a chewiness without the sweetness, or even using dark chocolate for a richer chocolate flavor.
FAQs
Can I make Rocky Road Ice Cream without an ice cream maker?
Yes, you can! Simply mix the ingredients in a bowl, pour into a container, and freeze, stirring every 30 minutes until it reaches the desired consistency.How long will Rocky Road Ice Cream last in the freezer?
When stored properly in an airtight container, it can last for about 2-3 months.Can I use non-dairy substitutes?
Absolutely! Almond milk, coconut cream, or oat milk can be great alternatives for a dairy-free version of this recipe.What types of nuts work best in Rocky Road Ice Cream?
Almonds, walnuts, and cashews are all delicious choices, but feel free to use your favorites for a personal touch.Can I add other toppings to my ice cream?
Yes! Feel free to experiment with toppings like sprinkles, crushed cookies, fresh fruits, or even a drizzle of caramel sauce.Is it possible to make a lower-sugar version?
Definitely! You can use sugar substitutes or natural sweeteners to adjust the sweetness to your preference, which is perfect for those watching their sugar intake.
Conclusion
Now that you’ve embarked on this delicious journey to create your very own Rocky Road Ice Cream, it’s time to indulge! The combination of creamy textures, rich chocolatey flavors, and delightful marshmallows and nuts make it a treat that’s simply irresistible. So why wait? Gather your ingredients, follow these step-by-step instructions, and dive into the delightful world of homemade Rocky Road Ice Cream today. Get ready to enjoy each scoop as it melts in your mouth, a blissful reminder of the joy that a simple dessert can bring.
Rocky Road Ice Cream
Ingredients
Ice Cream Base
- 2 cups heavy cream Use high-quality cream for best results.
- 1 cup whole milk For added creaminess.
- 3/4 cup granulated sugar Make sure it's fully dissolved.
- 1 teaspoon vanilla extract For flavor enhancement.
Mix-Ins
- 1/2 cup chocolate chips Rich and decadent.
- 1/2 cup mini marshmallows Adds sweetness and a soft texture.
- 1/2 cup chopped nuts Use almonds, walnuts, or cashews.
Instructions
Preparation
- Gather all ingredients together on the counter.
- In a large mixing bowl, combine heavy cream, whole milk, granulated sugar, and vanilla extract. Whisk until the sugar is dissolved.
Churning
- Pour the mixture into your ice cream maker and churn according to the manufacturer’s instructions (about 20 to 25 minutes).
- In the last five minutes of churning, add chocolate chips, mini marshmallows, and chopped nuts.
Freezing
- Transfer the ice cream into an airtight container, pressing it down. Cover with a lid and freeze for at least 4 hours.
Serving
- Scoop the ice cream into bowls and enjoy! Top with extra chocolate syrup or crushed nuts if desired.