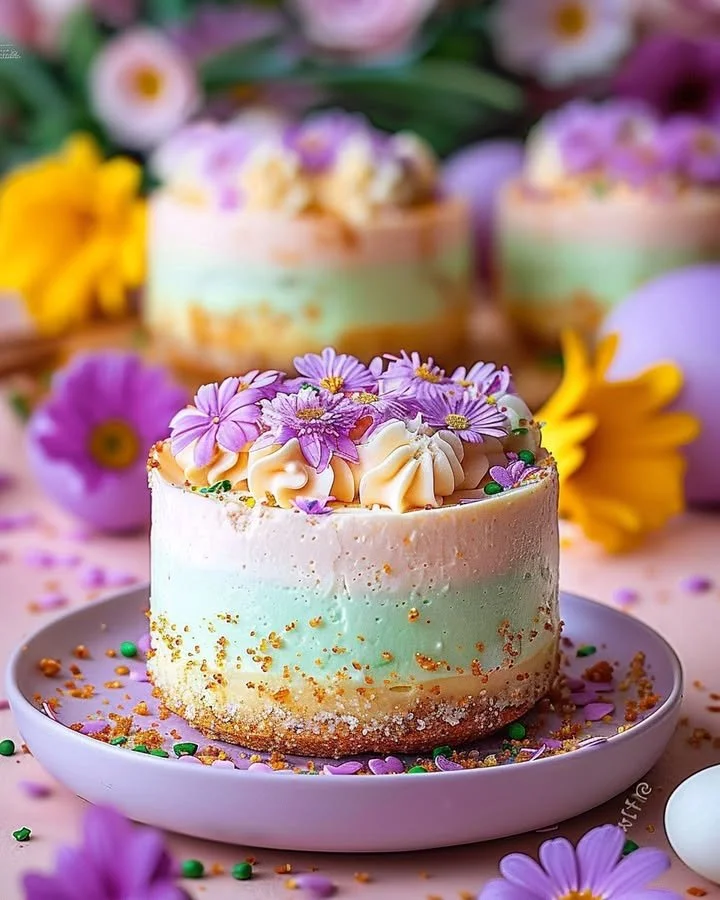
Easter No-Bake Mini Cheesecakes
There’s something inherently joyful about Easter, a time characterized by renewal and vibrant colors, and what better way to celebrate than with a delightful recipe for Easter No-Bake Mini Cheesecakes? This step-by-step guide will immerse you in a world of creamy textures, fragrant vanilla, and the sweetness of pastel hues. Each mini cheesecake is a bite-sized celebration, perfect for family gatherings or Easter brunch, evoking feelings of nostalgia and joy with every delectable mouthful.
The aromas wafting through the kitchen as you mix together velvety cream cheese, sugary marvels, and a touch of buttery graham cracker crust will have your loved ones eagerly anticipating dessert. These mini cheesecakes are not only a feast for the palate; they’re a visual delight, embellished with colorful toppings reminiscent of spring. Let’s turn this sweet fantasy into reality!
History / Fun Fact
The tradition of enjoying cheesecakes can be traced back to ancient Greece, where it was a popular dessert among the earliest Olympic athletes. Fast forward to today, and no-bake cheesecakes have made their mark as a delightful treat, especially during festive seasons like Easter. The simplicity of a no-bake recipe allows for ease and creativity, making it a favored choice for those wanting to spend less time in the kitchen and more time with family and friends. This recipe celebrates the joy of spring, transforming a classic dessert into colorful bites that are as fun to make as they are to eat.
Ingredients
To create these enchanting Easter No-Bake Mini Cheesecakes, you will need:
- 1 cup graham cracker crumbs (or crushed digestive biscuits): The base, with a warm, buttery aroma that provides a delicious crunch.
- 3 tbsp unsalted butter (melted): Rich and smooth, bringing everything together.
- 2 tbsp sugar (optional): A hint of sweetness that enhances the crust.
- 8 oz (225g) cream cheese (softened): Creamy and luscious, the star of our cheesecake filling.
- 1/2 cup powdered sugar: Fine and sweet, it adds the perfect touch to the filling.
- 1 tsp vanilla extract: Aromatic and warm, delivering an inviting flavor.
- 1 cup heavy whipping cream (cold): Whipped to fluffy perfection, adding lightness to the cheesecake.
- Pastel food coloring (pink, yellow, green, purple – optional): Vibrant hues that evoke the colors of spring.
- Easter candies (mini eggs, jelly beans, or chocolate bunnies): Edible decorations that add whimsy and festivity.
- Whipped cream (optional for topping): A cloud-like finishing touch to your mini masterpieces.
Cooking Time & Tips For Easter No-Bake Mini Cheesecakes
The beauty of these mini cheesecakes lies in their swift preparation. They take about 15-20 minutes to assemble but need chilling time of at least 2-3 hours to set effectively. For a quick version, be sure to pre-chill your ingredients, which helps speed up the setup. If you’re up for a delightful slow-preparation process, consider making the crust a day ahead for added flavor development.
Remember, success in this recipe hinges on the quality of your ingredients. Use fresh cream cheese and cold whipping cream for optimum results. Don’t rush the whipping process; soft peaks are key for that heavenly, airy texture.
Step-by-Step Directions
Prepare the Crust: Start by combining 1 cup of graham cracker crumbs, 3 tablespoons of melted unsalted butter, and optional 2 tablespoons of sugar in a bowl. The mixture should resemble wet sand. Line a 12-cup muffin tin with paper liners and take a tablespoon of the crumb mixture, pressing it firmly into each liner’s base to create a solid crust. Once done, pop the tray into the refrigerator to chill while you prepare the filling.
Make the Cheesecake Filling: In a large mixing bowl, beat together 8 oz of softened cream cheese, 1/2 cup of powdered sugar, and 1 teaspoon of vanilla extract. Use an electric mixer to ensure a smooth and creamy consistency. In another bowl, whip 1 cup of cold heavy cream until stiff peaks form. Gently fold the whipped cream into the cream cheese mixture, creating a light and airy filling.
Add Colors (Optional): If you’re playing with pastel hues, divide the cheesecake filling into 3-4 bowls. Add a few drops of your chosen pastel food coloring to each bowl, and stir until evenly distributed. The colors should reflect the joy of spring!
Assemble the Mini Cheesecakes: Once your crust has chilled, it’s time to fill them! Spoon the cheesecake filling onto the cooled crusts, layering the colors if you’ve opted for different shades. Use the back of a spoon to smooth the tops to perfection.
Chill and Decorate: Cover the muffin tin with plastic wrap and refrigerate the mini cheesecakes for at least 2-3 hours or until fully set. Before serving, top each mini cheesecake with your choice of Easter candies and a delightful swirl of whipped cream if desired. The result will be a feast for the eyes!
Serving Suggestions & Occasions
These Easter No-Bake Mini Cheesecakes are the perfect festive treat. They can be served at your Easter brunch, family gatherings, or as part of a spring celebration. For an added layer of festivity, arrange the cheesecakes on a colorful platter with flowers, pastel napkins, and themed decorations. Children and adults alike will appreciate the cute sizes and delightful flavors. Pair them with a refreshing lemonade or an afternoon tea to elevate the experience.
Common Mistakes For Easter No-Bake Mini Cheesecakes
One common mistake is not allowing the crust to chill properly, resulting in a crumbly base that struggles to hold its shape. Remember to press the crust firmly into the liners. Another error is over-whipping the heavy cream, which can lead to a grainy texture in your cheesecake filling. Always aim for soft peaks that are fluffy and tender. Lastly, be mindful of the temperature; if the cream cheese is too cold, it won’t blend well. Allow it to soften to room temperature before mixing to achieve a smooth filling.
Healthier Alternatives & Variations
For a healthier twist, consider using Greek yogurt in place of some of the cream cheese for a lighter texture. Swap out the graham cracker crust for a nut-based crust made from crushed almonds or oats for a nutritious boost. If you want to avoid refined sugar, natural sweeteners such as honey or maple syrup can be used instead.
As for variations, think about flavoring the cheesecake with a hint of lemon zest for brightness or adding pureed fruits into the filling for a fruity twist.
FAQs
Can I make these mini cheesecakes ahead of time?
Yes! They can be made a day before your event and will taste even better as they chill.How long do these cheesecakes last in the refrigerator?
They can be stored in an airtight container for up to 3 days.Can I freeze these mini cheesecakes?
While they can be frozen, the texture may change slightly once thawed. It’s best served fresh.What can I use instead of cream cheese?
You may substitute mascarpone or ricotta cheese for a different flavor profile.Are there egg-free variations for this recipe?
Yes! This recipe is egg-free as it does not require baking, making it suitable for those with egg allergies.Can I use whipped topping instead of heavy cream?
While you can use whipped topping, homemade whipped cream yields better flavor and texture.
Conclusion
These Easter No-Bake Mini Cheesecakes are not just about taste; they embody the spirit of Easter with their cheerful colors and delightful flavors. Imagine gathering around the table, surrounded by friends and family, each enjoying their own mini cheesecake while laughter fills the air. This recipe offers an easy way to create memorable moments in the kitchen, bonding through the art of baking. Don’t wait – grab your ingredients, unleash your creativity, and make the Easter celebration extra special with this delicious dessert that’s as fun to make as it is to eat!

Easter No-Bake Mini Cheesecakes
Ingredients
For the crust
- 1 cup graham cracker crumbs (or crushed digestive biscuits) Provides a delicious crunch.
- 3 tbsp unsalted butter (melted) Brings everything together.
- 2 tbsp sugar (optional) Enhances the crust's sweetness.
For the filling
- 8 oz cream cheese (softened) The star of the cheesecake filling.
- 1/2 cup powdered sugar Adds sweetness to the filling.
- 1 tsp vanilla extract Delivers inviting flavor.
- 1 cup heavy whipping cream (cold) Adds lightness to the cheesecake.
- pastel food coloring (pink, yellow, green, purple - optional) For vibrant hues.
For decoration
- Easter candies (mini eggs, jelly beans, or chocolate bunnies) For festive decoration.
- Whipped cream (optional for topping) A finishing touch.
Instructions
Preparation of the Crust
- Combine graham cracker crumbs, melted unsalted butter, and optional sugar in a bowl; mixture should resemble wet sand.
- Line a 12-cup muffin tin with paper liners and press the crumb mixture into each liner’s base to create a solid crust.
- Refrigerate the tray to chill while preparing the filling.
Making the Cheesecake Filling
- In a large mixing bowl, beat together softened cream cheese, powdered sugar, and vanilla extract until smooth.
- In another bowl, whip heavy cream until stiff peaks form.
- Gently fold the whipped cream into the cream cheese mixture until light and airy.
Adding Colors
- If using pastel hues, divide the cheesecake filling among several bowls and add food coloring to each, stirring until evenly distributed.
Assembling the Mini Cheesecakes
- Spoon the cheesecake filling onto the chilled crusts, layering colors if desired. Smooth the tops with a spoon.
Chilling and Decorating
- Cover the muffin tin with plastic wrap and refrigerate for at least 2-3 hours or until fully set.
- Top each mini cheesecake with Easter candies and a swirl of whipped cream before serving.