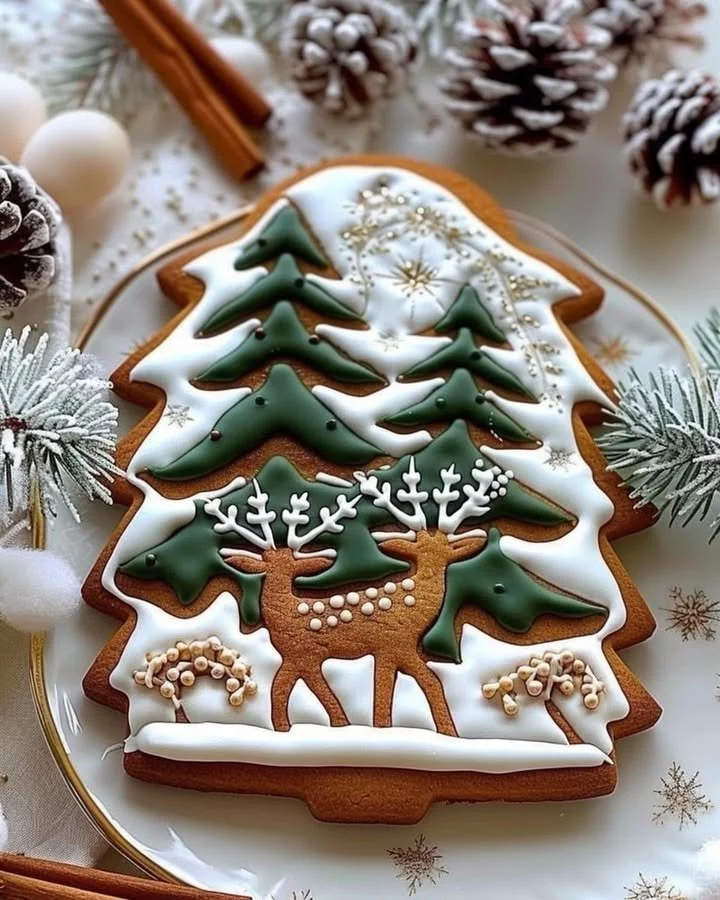
Gingerbread Cookies with Winter Forest Design are the perfect treat to infuse your home with warmth and holiday cheer. These aromatic cookies, adorned with a picturesque winter forest design, evoke the nostalgic spirit of the holiday season. The blend of spices—ginger, cinnamon, and cloves—creates a comforting scent that fills the kitchen, making it an inviting space for family and friends. This recipe not only brings joy through deliciousness but also offers a fun, step-by-step way to create festive memories together.
Why You’ll Love This Recipe
There’s a lot to love about Gingerbread Cookies with Winter Forest Design. First and foremost, they require simple ingredients that you likely already have in your pantry. Prep time is quick, allowing you to spend more time enjoying the process than dreading long, complicated steps. Even if you’re not a baker, the easy-to-follow directions ensure success, making it a definitive crowd-pleaser. Plus, creating gorgeous decorations with royal icing is a fantastic activity to share with children, as it encourages creativity and artistry, turning a baking session into a fun family bonding experience.
Ingredients
To prepare these delightful gingerbread cookies, gather the following:
- 3 1⁄4 cups (400g) all-purpose flour, delivering the perfect canvas for your cookies
- 3⁄4 teaspoon baking soda, helping each cookie rise to perfection
- 1 tablespoon ground ginger, adding warmth and spice for that classic flavor
- 1 tablespoon ground cinnamon, creating a familiar, cozy aroma
- 1⁄4 teaspoon ground cloves, offering a hint of earthiness
- 1⁄4 teaspoon nutmeg, giving a slightly sweet undertone
- 1⁄2 teaspoon salt, enhancing the overall sweetness
- 1/2 cup (115g) unsalted butter, softened to creamy perfection
- 1/2 cup (100g) packed brown sugar, providing rich depth
- 1 large egg, binding the mixture smoothly
- 2⁄3 cup (160ml) unsulfured molasses, imparting a rich sweetness
- 1 teaspoon pure vanilla extract, elevating all the flavors beautifully
- 3 cups (360g) powdered sugar, for a touch of sweetness in the royal icing
- 2 large egg whites or 3 tablespoons meringue powder mixed with 6 tablespoons water, for the ideal icing consistency
- 1/2 teaspoon vanilla or almond extract, adding a fragrant note
- Gel food coloring (green, white, brown, and optional blue) for festive designs
- Edible gold dust (optional for the deer), bringing a touch of elegance
- Fine sugar or edible glitter for a magical snow effect
- Small brush for detailing, essential for precision
- Piping bags and small piping tips (round and leaf tips), tools for creativity
Step-by-Step Directions
Begin by whisking together the flour, baking soda, ginger, cinnamon, cloves, nutmeg, and salt in a medium bowl. Set this aromatic mixture aside for later.
In a large bowl, cream the softened butter and packed brown sugar until light and fluffy, creating a dreamy texture.
Incorporate the egg, unsulfured molasses, and vanilla extract into the butter and sugar mix, continuing to mix until everything is well combined.
Gradually add the dry ingredients to the wet mixture. Stir until a dough forms and, if it feels sticky, don’t hesitate to add a little more flour.
Divide the cookie dough into two portions, wrap each in plastic wrap, and chill them for at least one hour. This step is crucial for easier rolling and cutting.
Once chilled, preheat your oven to 350°F (175°C) and line a baking sheet with parchment paper to prevent sticking.
On a lightly floured surface, roll out one portion of dough to about 1/4-inch thickness. Using cookie cutters, create festive shapes—think trees, snowflakes, and deer!
Transfer the cut shapes to the prepared baking sheets and bake for 8–10 minutes or until the edges are golden and fragrant.
Allow the cookies to cool on wire racks, ensuring they hold their shape for decorating.
To create the royal icing, beat the egg whites until stiff peaks form. Gradually add the powdered sugar and vanilla extract, mixing until smooth.
Divide the icing into bowls and color them with gel food coloring as desired.
Using piping bags fitted with small tips, pipe designs onto the cooled cookies. Bring your winter forest vision to life with intricate details.
For an added touch of magic, sprinkle with fine sugar or edible glitter for a snow effect, and use edible gold dust to highlight your decorations.
Allow the icing to dry thoroughly before serving or storing your cookies.
Tips & Tricks
- Make sure your butter is at room temperature for the best creaming results.
- If you want to avoid sticking, use flour liberally on your rolling surface.
- For a softer cookie, slightly underbake them, and they’ll remain chewy.
- For an elegant finish, spray your finished cookies lightly with cooking spray before adding edible glitter.
- Consider using a toothpick for more precise designs when piping.
Serving Suggestions & Pairings
These Gingerbread Cookies with Winter Forest Design are perfect as a centerpiece on any holiday dessert table. Serve them alongside a warm cup of spiced tea or hot cocoa for a delightful afternoon treat. They also make wonderful gifts when packaged in pretty boxes—great for holiday exchanges or as a thoughtful surprise for friends and family. For festive parties, consider pairing them with other holiday treats like peppermint bark or fruitcake.
Nutritional Information
These delightful cookies provide a mix of flavors that can energize your holiday gatherings, yet moderation is key. Each cookie holds about 150 calories, with varying amounts of sugar and fat depending on the decorations used. The balance of comforting flavors with sweet indulgence makes them a treat to enjoy during the holiday season.
Storing Tips & Variations
Store your Gingerbread Cookies in an airtight container to maintain their freshness. They can last up to two weeks at room temperature or can be frozen for up to three months. For variety, consider adding chopped nuts or dried fruits into the dough before baking, or switch up the spices based on your family’s preference. You can also experiment with different royal icing designs based on themes or occasions.
There’s always room for creativity, whether through shapes or icing—so let your imagination run wild!
Conclusion
Gingerbread Cookies with Winter Forest Design are not just a recipe; they are an experience filled with laughter, creativity, and the sweet aroma of the holidays. We encourage you to gather your loved ones, follow this easy step-by-step recipe, and create something magical together. Share your experiences and decorating creations, and let the spirit of the season fill your home!
FAQs
Can I use different types of flour for this recipe?
You can try whole wheat flour for a healthier alternative, but it may alter the cookie texture slightly.What can I use instead of egg whites for the royal icing?
You can use aquafaba (the liquid from canned chickpeas) as a vegan alternative or simply rely on meringue powder mixed with water.How do I prevent my cookies from spreading too much while baking?
Chilling the dough thoroughly before cutting shapes is essential for preventing excessive spreading during baking.Can I make these cookies ahead of time?
Absolutely! You can prepare the dough ahead of time, chill it, and even bake the cookies days in advance. Just decorate closer to serving time.How can I make my icing more durable for decorating?
Ensure you’re using enough powdered sugar and achieving the right stiff-peaks consistency when beating the egg whites. This makes the icing firm enough to hold intricate designs.
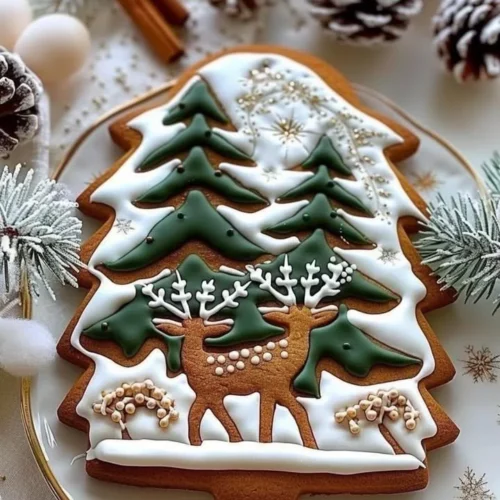
Gingerbread Cookies with Winter Forest Design
Ingredients
Dry Ingredients
- 3 1/4 cups all-purpose flour delivering the perfect canvas for your cookies
- 3/4 teaspoon baking soda helping each cookie rise to perfection
- 1 tablespoon ground ginger adding warmth and spice for that classic flavor
- 1 tablespoon ground cinnamon creating a familiar, cozy aroma
- 1/4 teaspoon ground cloves offering a hint of earthiness
- 1/4 teaspoon nutmeg giving a slightly sweet undertone
- 1/2 teaspoon salt enhancing the overall sweetness
Wet Ingredients
- 1/2 cup unsalted butter softened to creamy perfection
- 1/2 cup packed brown sugar providing rich depth
- 1 large egg binding the mixture smoothly
- 2/3 cup unsulfured molasses imparting a rich sweetness
- 1 teaspoon pure vanilla extract elevating all the flavors beautifully
Royal Icing Ingredients
- 3 cups powdered sugar for a touch of sweetness in the royal icing
- 2 large egg whites for the ideal icing consistency
Decorations
- 1/2 teaspoon vanilla or almond extract adding a fragrant note
- Gel food coloring (green, white, brown, and optional blue) for festive designs
- Edible gold dust (optional for the deer) bringing a touch of elegance
- Fine sugar or edible glitter for a magical snow effect
- Small brush for detailing, essential for precision
- Piping bags and small piping tips (round and leaf tips) tools for creativity
Instructions
Preparation
- Begin by whisking together the flour, baking soda, ginger, cinnamon, cloves, nutmeg, and salt in a medium bowl. Set this aromatic mixture aside for later.
- In a large bowl, cream the softened butter and packed brown sugar until light and fluffy, creating a dreamy texture.
- Incorporate the egg, unsulfured molasses, and vanilla extract into the butter and sugar mix, continuing to mix until everything is well combined.
- Gradually add the dry ingredients to the wet mixture. Stir until a dough forms and, if it feels sticky, don’t hesitate to add a little more flour.
- Divide the cookie dough into two portions, wrap each in plastic wrap, and chill them for at least one hour. This step is crucial for easier rolling and cutting.
Baking
- Once chilled, preheat your oven to 350°F (175°C) and line a baking sheet with parchment paper to prevent sticking.
- On a lightly floured surface, roll out one portion of dough to about 1/4-inch thickness. Using cookie cutters, create festive shapes—think trees, snowflakes, and deer!
- Transfer the cut shapes to the prepared baking sheets and bake for 8–10 minutes or until the edges are golden and fragrant.
- Allow the cookies to cool on wire racks, ensuring they hold their shape for decorating.
Royal Icing
- To create the royal icing, beat the egg whites until stiff peaks form. Gradually add the powdered sugar and vanilla extract, mixing until smooth.
- Divide the icing into bowls and color them with gel food coloring as desired.
- Using piping bags fitted with small tips, pipe designs onto the cooled cookies. Bring your winter forest vision to life with intricate details.
- For an added touch of magic, sprinkle with fine sugar or edible glitter for a snow effect, and use edible gold dust to highlight your decorations.
- Allow the icing to dry thoroughly before serving or storing your cookies.