Philadelphia Cherry Cheesecake
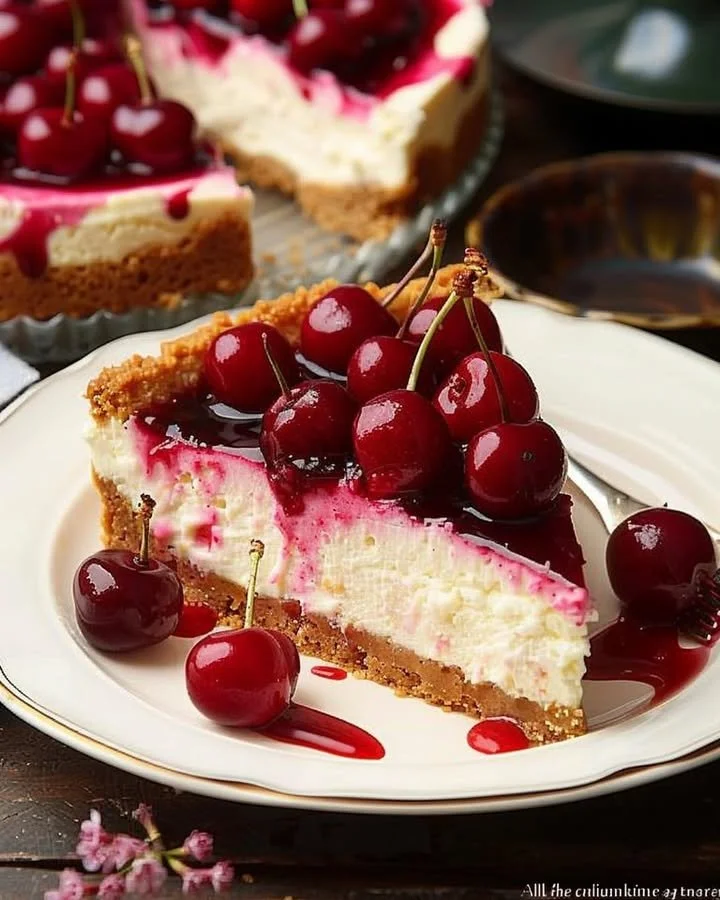
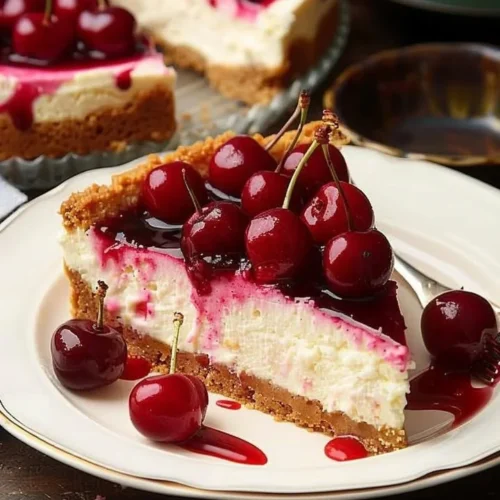
The Philadelphia Cherry Cheesecake is the embodiment of dessert perfection—a creamy, rich blend that combines the lusciousness of cream cheese with the refreshing burst of sweet cherry topping. This recipe is a step-by-step journey into a world of delightful aromas and textures. As you prepare this dessert, you’ll be enveloped by the comforting scent of melting butter mingling with sweet, crushed graham crackers—a sensory experience that ignites memories of family gatherings and celebrations. Each slice reveals a smooth, velvety filling resting atop a perfectly crumbly crust, invoking feelings of warmth and indulgence that make every bite an unforgettable experience.
History / Fun Fact
The origins of cheesecake can be traced back to ancient Greece, where it was served to athletes during the first Olympic Games in 776 BC. However, the version we know today, especially the rich and smooth Philadelphia Cherry Cheesecake, gained popularity in the United States in the early 20th century thanks to the creation of cream cheese. Named after the city of Philadelphia, this cheesecake style is beloved for its buttery crust and creamy filling topped with vibrant fruit. The iconic cherry topping has become a staple in homes across the nation, making it a timeless dessert that brings people together at the table.
Ingredients
To create this mouthwatering Philadelphia Cherry Cheesecake, you will need the following ingredients that promise to elevate your dessert game:
- 1 1/2 cups of graham cracker crumbs, perfectly crumbly and slightly sweet, offering the ideal base for your cheesecake.
- 1/4 cup of granulated sugar, adding a hint of sweetness to the crust and enhancing its flavor.
- 1/2 cup of unsalted butter, melted to achieve a rich, buttery taste and a delightfully moist texture.
- 2 packages (8 oz each) of Philadelphia cream cheese, softened to an almost fluffy consistency, delivering a smooth richness that’s unbeatable.
- 1 cup of granulated sugar to sweeten the creamy cheesecake filling without overpowering the other flavors.
- 3 large eggs, added for structure and a lightweight texture that keeps the cheesecake perfectly airy.
- 1 teaspoon of vanilla extract, infusing warmth and depth into the filling.
- 1/2 cup of sour cream, giving extra creaminess and a tangy flavor profile that balances the sweetness.
- 1 can (21 oz) of cherry pie filling, bursting with juicy sweetness and a vibrant color that creates a stunning topping for your cheesecake.
Cooking Time & Tips For Philadelphia Cherry Cheesecake
When making Philadelphia Cherry Cheesecake, it’s important to understand the difference between quick and slow preparation. A quicker method can yield a satisfying dessert, but allowing time for the cheesecake to chill significantly enhances its flavor and texture. Ideally, you should plan for at least four hours of chilling after baking, although overnight is even better for deepening the flavors.
Here are some practical tips for success:
- Ensure that your cream cheese is softened to prevent lumps in the filling; this creates that smooth, velvety texture that makes cheesecakes irresistible.
- Don’t skip the cooling period after baking; this allows the cheesecake to set properly.
- To avoid cracks on the surface, bake the cheesecake in a water bath by placing your springform pan in a larger pan filled with water during baking.
Step-by-Step Directions
Begin your culinary adventure by preheating your oven to 325°F (160°C). Grab a 9-inch springform pan and grease it generously; this will allow for easy removal later on.
In a medium bowl, combine 1 1/2 cups of grappling cracker crumbs, 1/4 cup of granulated sugar, and 1/2 cup of melted butter. Use a fork or your fingers to mix and press this mixture firmly into the bottom of your prepared pan. Bake it for 10 minutes until it’s lightly golden, then remove it from the oven and let it cool.
In a large mixing bowl, beat together 2 packages of softened Philadelphia cream cheese and 1 cup of granulated sugar until the mixture is creamy and free of lumps. Add 3 large eggs one at a time, mixing well after each addition. Stir in 1 teaspoon of vanilla extract and 1/2 cup of sour cream until you achieve a smooth consistency.
Pour the luscious cream cheese filling over your cooled crust, using a spatula to smooth the top, ensuring it’s evenly distributed. Slide the cheesecake into the preheated oven and bake for about 55-60 minutes, until the cheesecake is set and lightly golden around the edges.
Once baked, allow the cheesecake to cool at room temperature; resist the urge to cut into it! Chill the cheesecake in the refrigerator for at least 4 hours, allowing the flavors to mingle and the texture to firm up beautifully.
Just before serving, top the cheesecake with the vibrant cherry pie filling, allowing those juicy cherries to cascade over the surface and create a stunning presentation.
Serving Suggestions & Occasions
Philadelphia Cherry Cheesecake is not just a dessert; it’s a celebration on a plate! This delectable dish is perfect for a variety of occasions, such as birthdays, anniversaries, holiday gatherings, or simply as a weekend treat to share with loved ones. Pair it with a steaming cup of coffee for a cozy afternoon delight or serve it alongside a chilled glass of milk for a nostalgic treat. The stunning cherry topping and creamy base are sure to impress guests, making it an ideal centerpiece for any gathering.
Common Mistakes For Philadelphia Cherry Cheesecake
Even the most seasoned bakers can fall prey to common cheesecake pitfalls. One of the primary mistakes is not allowing the cream cheese to soften adequately, resulting in a lumpy texture. Another frequent error is rushing the cooling process; a cheesecake needs time to set, so don’t be tempted to skip this vital step. Additionally, avoid opening the oven door while baking, as sudden temperature changes can cause cracks. Lastly, remember to let your cheesecake chill completely before adding the cherry topping for the best flavor and presentation.
Healthier Alternatives & Variations
If you’re looking to lighten up your Philadelphia Cherry Cheesecake, consider these healthier alternatives:
- Swap regular cream cheese for a low-fat or Neufchâtel cream cheese option to reduce calories and fat.
- Use Greek yogurt instead of sour cream for a protein boost and lower fat content.
- Opt for a crust made from almond flour or whole grain crackers for a wholesome twist.
- Experiment with fresh cherries or other fruits to top your cheesecake, adding a burst of flavor and color.
FAQs
Can I make Philadelphia Cherry Cheesecake in advance?
Absolutely! In fact, it’s best made a day ahead, allowing the flavors to develop.How long does the cheesecake last in the refrigerator?
Stored properly, it can last for up to one week in the fridge.Can I freeze the cheesecake?
Yes, you can freeze it without the cherry topping! Wrap it tightly and it will stay fresh for up to three months.How do I know when the cheesecake is done baking?
The edges will be set while the center will have a slight jiggle when you gently shake the pan.Can I use another fruit topping?
Definitely! Fresh berries, peaches, or even chocolate sauce can make beautiful and delicious alternatives.What can I substitute if I don’t have a springform pan?
You can use any suitable baking dish, but ensure it’s well-greased for easy removal.
Conclusion
The Philadelphia Cherry Cheesecake is not just a delightful dessert; it’s an experience filled with indulgence and joy. From the creamy filling to the vibrant cherry topping, every aspect of this cheesecake is a treat for the senses. Tempted to try it? This recipe is a sure-fire way to impress friends and family alike. Grab your ingredients and step into your kitchen to create a masterpiece that will leave everyone craving just one more slice!
Philadelphia Cherry Cheesecake
Ingredients
For the crust
- 1.5 cups graham cracker crumbs Perfectly crumbly and slightly sweet.
- 0.25 cups granulated sugar Enhances the flavor of the crust.
- 0.5 cups unsalted butter Melted for richness.
For the filling
- 16 oz Philadelphia cream cheese 2 packages, softened.
- 1 cups granulated sugar To sweeten the filling.
- 3 large eggs For structure.
- 1 teaspoon vanilla extract Infuses warmth and depth.
- 0.5 cups sour cream Adds extra creaminess.
- 21 oz cherry pie filling For topping.
Instructions
Preparation
- Preheat your oven to 325°F (160°C) and grease a 9-inch springform pan.
- In a medium bowl, combine graham cracker crumbs, sugar, and melted butter. Mix and press into the bottom of the prepared pan. Bake for 10 minutes and let cool.
Filling
- In a large mixing bowl, beat the softened cream cheese and sugar until creamy and lump-free.
- Add eggs one at a time, mixing well after each addition. Stir in vanilla extract and sour cream until smooth.
- Pour the filling over the cooled crust and smooth the top.
- Bake for 55-60 minutes until set and golden around the edges.
Cooling
- Cool at room temperature, then chill in the refrigerator for at least 4 hours, preferably overnight.
- Top with cherry pie filling just before serving.