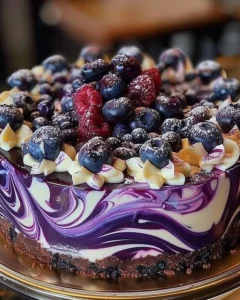
Butterfinger Balls: A Sweet Indulgence You Can’t Resist
There’s something undeniably nostalgic about the combination of creamy peanut butter and crunchy Butterfinger candy bars. Butterfinger Balls are not only a delightful treat to enjoy, but they also offer an experience that evokes childhood memories. The way the rich chocolate cascades over the crispy surprises within makes each bite an indulgent moment you won’t want to miss. If you’re in search of a fast and satisfying dessert that’ll whisk you back to simpler days, then these sweet orbs of heaven are exactly what you need. With minimal prep time and a few simple ingredients, you can whip up this mouthwatering delight that’s perfect for any occasion—or just for treating yourself after a long day!
Why You’ll Love This Recipe
You’ll absolutely love the Butterfinger Balls for countless reasons. This no-bake recipe is extremely easy to prepare, making it a fantastic choice for both novice bakers and seasoned pros alike.
With their delightful texture and scrumptious flavors, these sweet bites are sure to be a crowd-pleaser and will please guests of all ages. Additionally, the ingredients are minimal yet delightful, meaning you’ll find it hard to resist doubling the recipe!
Perfect for last-minute gatherings or special occasions, Butterfinger Balls transform into a delightful centerpiece that encourages indulgence and joy. Best of all, they come together so quickly that you can have a delicious dessert ready for those spontaneous sweet cravings.
Ingredients
- 4 Butterfinger candy bars (crushed)
- 1 cup creamy peanut butter
- 2 cups powdered sugar (sifted)
- 1 cup semi-sweet chocolate chips
- 1 tbsp coconut oil
Each ingredient plays a pivotal role in creating the nostalgic flavor profile that has enchanted so many. The Butterfinger bars contribute that unmistakable crunchiness, while the creamy peanut butter adds a rich layer of flavor that envelops your taste buds. With powdered sugar amplifying the sweetness, the combination becomes dangerously addictive.
As you melt the semi-sweet chocolate chips, that luscious aroma will waft through your kitchen, creating an inviting atmosphere that hints at the extraordinary treat that awaits you.
Timing
If you’re aiming for a fast and indulgent dessert, look no further! Making Butterfinger Balls requires minimal time from start to finish. You can have these bite-sized masterpieces ready in just about 30 minutes—ideal for when those sweet cravings strike unexpectedly.
However, if you want to savor the process and bask in the anticipation, you can opt for a more leisurely approach, allowing them to chill in the fridge longer or experiment with various chocolate coatings. The beauty lies in the flexibility; whether you’re in a rush or want to treat yourself to a luxury of time, the result remains remarkably delectable.
Step-by-Step
Prepare Your Workstation
Begin by setting the stage. Line a baking tray with parchment paper to create a perfect landing pad for your finished butterfinger balls, ensuring they won’t stick. You want those sweet treats to glide off easily!
Crush the Butterfinger Bars
Next, it’s time to unleash some energy! Crush the Butterfinger bars into fine crumbs using a food processor or even a trusty rolling pin. The sound of the candy breaking apart will fill you with excitement as you envision the magic that’s about to happen.
Blend the Ingredients
In a mixing bowl, combine the crushed Butterfingers, creamy peanut butter, and sifted powdered sugar until they meld together into a sticky, irresistible mixture. You’ll be transfixed by the velvety texture and mouthwatering scent that fills the air, showcasing how decadent this treat truly is.
Roll Into Balls
Now comes the fun part. Roll the mixture into golf ball-sized balls—about one tablespoon each—and place them onto your lined parchment paper. You’ll love the way your hands glide across the mixture, creating small orbs of bliss that are just waiting to be devoured.
Melt the Chocolate
In a microwave-safe bowl, melt the chocolate chips and coconut oil in 30-second intervals, stirring until smooth. The silky chocolate will beckon for you to dive in, before you finally dip each ball into the melted chocolate—ensuring they’re generously coated.
Set and Serve
After dipping, return the Butterfinger Balls to the parchment paper and let them cool in the fridge for at least an hour until the chocolate is set. Just imagine the moment when you take that first luscious bite and the harmonious blend of flavors dances across your palate!
Nutritional Information
With indulgence comes the occasional guilt, but don’t fret! Each Butterfinger Ball offers a heavenly balance between sweet satisfaction and playful enjoyment. Depending on the size, each ball can contain approximately 150 calories, which makes for a delightful treat that can easily become an occasional indulgence.
Relish the fact that sometimes it’s perfectly okay to treat yourself!
Healthier Alternatives
If you’re looking to indulge while keeping it a tad healthier, consider these options:
- Low-Sugar: Swap out powdered sugar for a low-sugar alternative to lessen the sweetness without sacrificing flavor.
- Dairy-Free: Substitute plant-based chocolate chips and almond or coconut milk for the peanut butter to keep it dairy-free.
- Nut Butters: Experiment with almond or cashew butter for a unique twist on the classic recipe while maintaining that creamy texture.
These alternatives will allow you to enjoy Butterfinger Balls without compromising your dietary preferences!
Serving Suggestions
Butterfinger Balls are a versatile treat that can shine in multiple settings. Want to make your dessert table even sweeter? Serve them alongside a scoop of creamy vanilla ice cream, creating a delightful contrast to the rich flavors.
They can also be an exciting addition to holiday celebrations, fun birthday party treats or even little gifts for friends.
Just imagine stringing them up in little bags, tied with bright ribbons, as an unexpected but incredibly welcomed surprise!
Common Mistakes
While this recipe is beautiful in its simplicity, a few common pitfalls can occur:
- Overbaking: Although this is a no-bake recipe, melting chocolate can be tricky. Avoid cooking it too long, as it can seize up and become unusable.
- Texture Issues: If you struggle to form the balls, ensure your mixture is well-blended without any lumps. A little extra peanut butter can help if there’s too much powder.
- Messy Coating: When dipping the balls in chocolate, try using a fork for easier handling. It will keep things tidier and allow for an even coat.
Storing Tips
Your Butterfinger Balls can be stored efficiently for future indulgences:
- Freezing Portions: Place the balls in an airtight container or freezer-safe bag. These bites will keep well in the freezer for up to three months!
- Reheating Instructions: To enjoy your sweet treat again, simply allow them to thaw at room temperature or pop them in the microwave for a few seconds.
Conclusion
If your sweet tooth is calling, there’s no reason to resist the enticing allure of Butterfinger Balls! Easy to prepare with a delightful combination of flavors and textures, these delectable treats promise to bring joy and nostalgia into your life. Make a batch today, and share the irresistible joy they bring! Your family and friends will undoubtedly be thanking you for this sweet indulgence.
FAQs
1. Can I use crunchy peanut butter instead of creamy?
Absolutely! Crunchy peanut butter will add an extra textural element.
2. How can I make these gluten-free?
This recipe is inherently gluten-free, but ensure you check the packaging of the Butterfinger bars.
3. How long do Butterfinger Balls last in the fridge?
They can be stored in the refrigerator for up to a week in an airtight container.
4. Can I make these in advance for a party?
Yes! These treats can be made up to two days in advance and stored in the fridge.
5. What can I do if my chocolate becomes too thick during melting?
Add a small amount of coconut oil to the chocolate while melting to keep it smooth and manageable.
Enjoy diving headfirst into the delightful world of Butterfinger Balls and let your taste buds revel in the joyous experience!
PrintButterfinger Balls

Indulge in these no-bake Butterfinger Balls made with creamy peanut butter and crunchy Butterfinger bars, draped in rich chocolate for a nostalgic treat.
- Prep Time: 15 minutes
- Cook Time: 15 minutes
- Total Time: 30 minutes
- Yield: 24 servings 1x
- Category: Dessert
- Method: No-Bake
- Cuisine: American
- Diet: Vegetarian
Ingredients
- 4 Butterfinger candy bars (crushed)
- 1 cup creamy peanut butter
- 2 cups powdered sugar (sifted)
- 1 cup semi-sweet chocolate chips
- 1 tbsp coconut oil
Instructions
- Line a baking tray with parchment paper.
- Crush the Butterfinger bars into fine crumbs.
- In a mixing bowl, combine the crushed Butterfingers, creamy peanut butter, and sifted powdered sugar.
- Roll the mixture into golf ball-sized balls and place them onto the lined parchment paper.
- Melt the chocolate chips and coconut oil, then dip each ball into the melted chocolate until well-coated.
- Return the dipped balls to the parchment paper and chill in the fridge for at least 1 hour until the chocolate is set.
Notes
For a healthier version, consider using low-sugar alternatives for powdered sugar or using dairy-free chocolate alternatives.
Nutrition
- Serving Size: 1 ball
- Calories: 150
- Sugar: 15g
- Sodium: 150mg
- Fat: 8g
- Saturated Fat: 3g
- Unsaturated Fat: 5g
- Trans Fat: 0g
- Carbohydrates: 18g
- Fiber: 1g
- Protein: 3g
- Cholesterol: 0mg